Introducing PelletVent Pro® by DuraVent, a state-of-the-art venting system designed specifically for wood pellet, corn, biofuels, and oil-fueled stoves and inserts. Crafted for longevity, safety, and aesthetic appeal, it stands out as an industry benchmark.
With its UL listing in both the United States and Canada, PelletVent Pro® ensures a minimal 1" clearance to combustibles, guaranteeing safety. The double-wall, air-insulated construction ensures optimal performance, while the corrosion-resistant superferric interior walls attest to its durability and attention to detail.
Our catalog proudly showcases Pellet and Biofuel solutions from the trusted brand, DuraVent. Whether you're in search of a clean-out tee cap or a Stove Pipe PV Tee cap, we cater to all your venting needs. Choose PelletVent Pro® for unmatched performance, safety, and design in biofuel venting.
Applications and Installation Solutions:
Applications
PelletVent Pro is a venting system designed for stoves and inserts that use wood pellets and oil fuel. It is also built to vent biofuel products such as corn, switch grass, cherry pits, soybeans, coffee husks, sunflower hulls, walnut shells and wheat, to name a few. (Rated for continuous use flue temperaftures up to 570°F.)
Materials and Construction
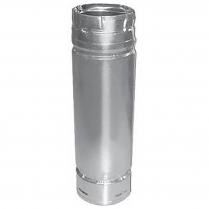
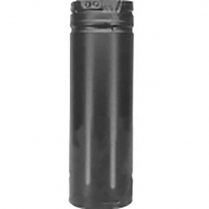
Laser-welded, double-wall pipe with a .012" inner wall of 444 stainless steel and a .018" laser-welded galvalume outer wall. Painted black exterior available. Primary metal-to-metal connection seals joint. Encapsulated o-ring provides a secondary seal.
Clearances
1" clearance to combustibles in the USA and Canada for appliances using corn and other biofuels, wood pellets or oil.
Shrouds
UL Listed with DuraVent shroud specifications. Information available online at www.duravent.com or call and request L157.
Diameters
3" and 4"
Listings
c-UL-us Listed to UL 641 (MH8381 and MH14420).
ULC Listed to ULC S609, ULC/ORD C441 (CMH1439 and CMH1440).
Typical Installations
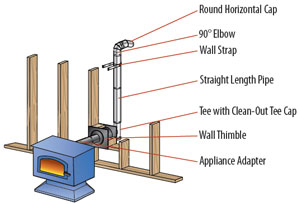
Refer to our Typical Venting Installation drawings to select the appropriate component parts for your installation.
- The inner pipe diameter should match the outlet size of the appliance. For installations that require 4" vent and the appliance has a 3" outlet, use an Increaser Adapter 3"-4".
- Check the appliance manufacturer's installation instructions to confirm which types of vent configurations are permitted (i.e. horizontal, vertical, chimney reline, etc.). Also, check for any venting restrictions such as maximum horizontal run, minimum and maximum vertical rise, maximum offset, etc.
- Be fire safe! Maintain the minimum clearances (air-space) between the vent pipe and nearby combustibles, as specified in the appliance manufacturer's installation instructions. Use proper support and bracing. Follow local building codes and have your venting system inspected.
More Typical Installations
Installation Key:
| 1 | Vertical Cap |
| 2 | Storm Collar |
| 3 | Flashing |
| 4 | Cathedral Ceiling Support Box |
| 5 | Straight Length Pipe |
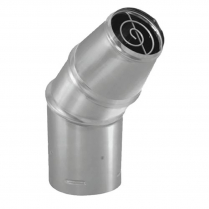
| 6 | 45° Elbow |
| 7 | Appliance Adapter |
| 8 | Flex Length |
| 9 | 90° Elbow |
| 10 | Horizontal Cap |
| 11 | Wall Thimble |
| 12 | Celling Support Firestop Spacer |
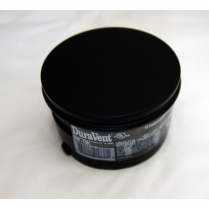
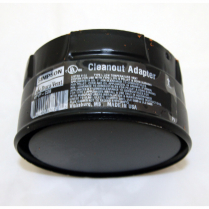
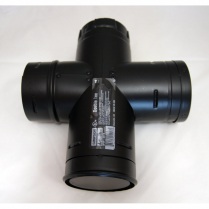
| 13 | Tee w/Clean-Out Tee Cap |
| 14 | Wall Strap |
| 15 | Attic Insulation Shield |
| 16 | Prairie Termination Cap |

Planning your Installation
1. Refer to the Typical PelletVent Pro Installations diagram, on the opposite page, to be familiar with some of the standard PelletVent Pro installations and the required component parts.
2. For a horizontal termination, you will need a Wall Thimble and a Horizontal Cap. The cap must be installed with a 6" clearance to the outside wall (refer to appliance manufacturer's installation instructions for other clearances).
3. For a vertical termination, you will need a Cathedral Ceiling Support Box or Flat Ceiling Support, Attic Insulation Shield (if passing through an attic), Flashing, Storm Collar, and Vertical Cap.
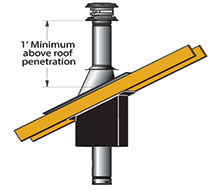
4. Determine the length of PelletVent Pro pipe required. For a vertical termination, measure the pitch of the roof and select the proper flashing. The required minimum height above the roof is 12".
5. Pellet stove inserts in masonry fireplaces will require a flex pipe to snake the vent past the smoke shelf. For the transition from PelletVent Pro to an existing DuraPlus, DuraPlus HTC, or DuraTech Chimney, a Chimney Adapter is available.
6. For vertical rise of PelletVent Pro on the outside of the house, Wall Straps should be used at 4' intervals to provide proper support.
7. Important! Check to be sure that the appliance and the venting system are in compliance with all minimum clearance to combustible requirements.
Recommendations
The following design recommendations are a general guideline to assist in the design and selection of venting components for your installation. Always follow DuraVent Installation instructions before installing your chimney system (found with the cap or support box).
- Size the vent to meet the appliance manufacturer's specifications.
- Avoid long runs and excessive use of elbows. Refer to the appliance manufacturer for minimum rise and maximum run configurations for the venting system.
- Use an Appliance Adapter to ensure a proper connection to appliance. Seal adapter to appliance with high temperature sealant.
- Use a Single Tee with Clean-Out Tee Cap to facilitate easy cleaning. It is recommended to use a tee off the back of an appliance.
- In the United States and Canada, maintain the minimum 1" clearance (air space) from vent pipe to combustibles. Use proper support and bracing. Follow local building codes and have your venting system inspected. Be fire safe!